Teaching Numbers
I absolutely LOVE teaching numbers!! There are so many fun things to do with numbers and I love how there are such a variety of ways to show numbers. That is exactly what I like to focus on during the first few months of school.
I have been asked a lot about how I teach numbers and what my week looks like. I hope this post will give you an idea of what my week looks like and also a lot of new ideas!

Each week of school I have a focus number. I start at the number 1 and go all the way to the number 10. That is 10 weeks of number focus! I am sure you are thinking, what do you do for 10 weeks of numbers?!?! I promise there is soooo much you can do while keeping students engaged and excited the entire time!
What I love about having a number focus each week of school is how much my students really master identifying numbers, counting, writing numbers, identifying number words, making groups, drawing, showing numbers in ten frames, on number lines, tallies, and so much more!
I have also noticed that having a weekly number focus has really set up my students for when it comes time to learn about addition, subtraction, comparing numbers, decomposing numbers, and more. The weekly number focus allows them to mentally know what the numbers look like and how to show the number in different ways that it makes them ready to go when it comes to more difficult skills as the year goes on.
The first week of school, I start with the number 0. You can grab all of the activities for the number 0 for FREE on another one of my blog posts HERE.
The second week of school is when I really get going with the weekly number focus and I start with the number 1.
The rest of this post will give you an example of what my weekly number focus looks like. I break down each day and the activities I do each day. I chose the number 4 as my example to show you.
*NOTE: This is a lot of reading, but I wanted to make it feel like you are there in my classroom!
 I refer to this number board a lot during the week and I use the number board to show our new learning about the number each day.
I start by showing my students the number 4 on the number board and have them say the number with me. I take my finger and model how to make the number 4 by tracing the number with my finger on the number board. I do this a couple of times and then I have the students put their "magic pencil" (which is really just their pointer finger) in the air and practice making the number 4 with me.
Then I model how to make the number 4 on my easel with a dry erase marker. I model this a few times and have students use their "magic pencil" to write the number 4 on their leg or on the floor.

The number word is also on my number board so I like to tell my students that we can also spell the number 4. I spell the number for them and then they spell the number with me as I point to each letter on the number board. I have students practice writing the number 4 with their "magic pencil" one more time.
Now it is time to move around! I allow students to walk around the room to see if they can find the number 4 anywhere in the classroom. They get really excited for this because they want to be the one to find the number! I have numbers all throughout my room and I am sure you do too! I actually didn't realize how many numbers I had around my room until I had students do this activity.
After this, we sit back down and discuss a couple of places that students found the number 4. Then, I model what they will be working on independently at their seats. After modeling a 'Trace, Write, and Find' activity with the number 4 focus I have students go to their seats and they get started.


After this independent activity, we come back together on the carpet in front of the number board. I ask students to come up and model making the number 4 on the easel. While a student is doing that, everyone else is practicing writing the number 4 with their "magic pencil". Then you can either have a student or yourself write the number 4 on the number board to show the new learning for the day which was identifying and writing the number 4. We practice spelling the number a couple more times too!

One last activity that I like to do for the day is a rainbow writing and filling in the number with an object activity. For the number 4, I like to have students rainbow write the number and then I have them make the number four using square pieces of construction paper. I explain to my students that I like to use squares because it has 4 sides and 4 corners. You can also use rectangles or mention that they would be a great choice to make the number 4 as well because they have 4 sides and 4 corners too! After modeling the activity, students go to their seats and get started.


Now I will point out the handprint and tell students that we can show the number 4 with our fingers. I model and then have students try. We touch each finger and count them. Then we close our hand and put one finger up at a time and stop at 4. I tell students to listen for that number 4 and when they hear themselves say the number that will tell them that they need to stop counting. I often hear them count out loud, "1, 2, 3, 4, STOP!!!!" Too funny!!!
Then I will talk about making a group of 4. I have magnets on my whiteboard that I like to use to make a group of. I make a group of 4 a couple different times. I put one magnet at a time on my easel and say 1 number at a time and stop when we get to 4. I show students how the group of 4 can be in a line, in a cluster, a circle, etc. We always double-check the group that I make by touching one magnet and saying one number at a time.
**I really go over the touch and count one at a time because so many times students will count to 3, but only touch one OR they count to 1 and have already touched 3.
I like to turn my easel so my students can't see what I am doing. I will put a bunch of magnets on the easel and make different groups of 4 (with my magnets) and different groups that do not have 4. When I turn the easel back around I have students come up and they point to a group of 4 that they see and circle it with a dry erase marker. The rest of the class helps by counting the group of 4 while the student touches one magnet at a time.

Now it's time to move! I model with a manipulative (bears, counters, buttons, blocks, cereal, etc.) making groups of 4. Then students go to their seats, I pass out the manipulative I chose for the day, and students start making groups of 4 at their tables.


After this activity, we come back together on the carpet in front of the number board. I ask students to come up and model making a group of 4 on the easel with the magnets or draw a group of 4 with a marker. While a student is doing that, everyone else is counting out loud to 4 and reminding the student to stop when they get to 4. I usually allow around 3 to 4 students come up to do this.

Now I will model what they will be working on independently at their seats. After modeling a 'Find a Group of 4' activity, I have students go back to their seats to get started.

To show the new learning of the day, you can have a student come up to the number board and draw 4 pictures to show a group of 4 or you can draw a group of 4. Everyone else will be counting while the group of 4 is being made on the number board and reminding the person when to stop.

Then I do a review of yesterdays learning. I have students show the number 4 on their fingers. Then we count to 4 using our fingers and make sure we stop when we hear ourselves say the number 4. I discuss how we practiced showing 4 by drawing groups of 4 and some that are not. Students come up to the easel and circle all the groups that have 4. When they find a group the rest of the class double-checks by counting out loud while the student touches one picture at a time in the group.
I show students the correct way of touching and counting one picture at a time. I also show the incorrect ways. I will count to 3 quickly while only touching 1 picture and I will count to 1 while touching 3 pictures. This definitely makes my students laugh, but I always feel it is important to show them the correct and wrong way.

I have a space on my number board with a domino. I like to place some dots on one side of the domino and have students determine how many more dots we need to put on the other side to have 4 altogether.

For a fun follow-up activity and to get moving, I like to have students stand up and try to make a group of 4 with their friends. This is a lot of fun for them! If there are students left over that do not make a group of 4 that is okay because it is a great example to show why it is not a group of 4 and to have students try to figure out how many more students they need to make a group of 4. The domino on the number board is great practice before doing this activity.
We all come back together and I talk about how today is all about the ten frame! I always like to ask why it is called a 'ten frame'. I will draw a ten frame on my easel and fill in the boxes with magnets while having students count and tell me when to stop. At this point they remember that they stop when they hear that number 4! I also remind them that it is important to double-check, so we go back and I touch each magnet as they count out loud to make sure that there are only 4 boxes filled in.

I have a GIANT ten frame that I made out of felt and duct tape. I have everyone sit in a big circle around the carpet and I lay the GIANT ten frame in the middle. During this time I have students come up and fill in 4 boxes in the ten frame. This week, we happen to be reading "Pete the Cat and His Four Groovy Buttons"and I had students hold buttons while filling in the 4 spots in the ten frame. We always double-check that we have 4 by counting each student in the ten frame.
I like to put too many students in the ten frame sometimes or too little students and have them determine why that is not correct and brainstorm what we need to do to have 4.


After this activity, I quickly fold up the GIANT ten frame and model what they will be working on independently at their seats. After modeling a 'Ten Frame Fill, Trace, and Write' activity, I have students go back to their seats to get started.

To show the new learning of the day, you can have a student come up to the number board and draw 4 dots in the ten frame to show 4. On my number board, I place velcro on the ten frame and have students come up and velcro stars onto the ten frame. Everyone else will be counting while the ten frame 4 is being filled on the number board.

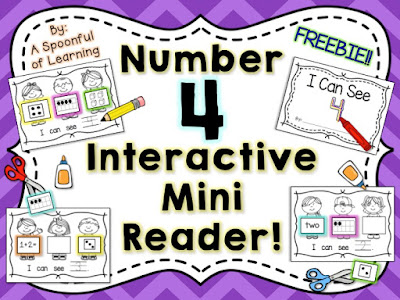
If time allows, I like to have students work independently on an interactive number book. Each week I have them work on them and each book has a number focus. The best part of all is that they are all FREE!!! You can find them for free at my TPT Store HERE. (This will take you to the Number 4 Book, but the links to the other books are in the description.

I also have a space to on my number board to write tallies and I like to show students how you can show the number 4 with tallies.

Then I do a review of yesterdays learning. I draw a ten frame on my easel. I will have students count with me and let me know when to stop filling in the ten frame. I also like to turn the easel around and fill in 5 or more spaces in the ten frame. Then, I will show students and have them explain to me why the ten frame is wrong when our focus number is the number 4.
I will turn the easel again and put too many dots again or too little dots in the ten frame. I will have students turn and talk to their friend to discuss what is wrong and what needs to be done to have 4 in the ten frame. After talking with their friend, students will tell me what needs to be done and you can have them come up to the easel to show the class.

Now I let my students know that today is all about the number line! I will draw a number line to 10 on my easel. I explain to them that we start at the number 0 on the number line. Every time we say a number we make 1 hop. I really make sure to go over how we only make 1 hop when we say 1 number. Students will count with me as I make the hops on the number line. They also tell me when to stop. I swear that is their favorite part!
The idea of making hops on the number line may seem simple to us, but some students have a hard time with it. Some students make 2 hops for every number they say and sometimes they do not move at all! I often model the incorrect ways to make hops and have students come up and take my hand and help me move to one number at a time.

Time to move! I also have a GIANT number line that I made out of construction paper and large numbers. (I need to update my numbers to a cuter font. They are from so long ago!)
I have everyone sit on one side of the carpet and I lay the GIANT number line on the other side of them. I place a number under each dot. This is great practice for number order with your students! I always mess up the number order on purpose and have them help me put the numbers in the correct order. They think it is so funny when I mess up!
Once everything is ready, I have a student come up and stand at the number 0 next to the number line. They start hopping to one number at a time and stop when they get to 4. While they are hopping the rest of the class is counting out loud and reminding them when to stop. They LOVE this!! It might sound crazy, but everyone does get a turn. We move fast!!


After this activity, I quickly fold up the GIANT number line and model what they will be working on independently at their seats. After modeling a 'Number Line Hop, Trace, and Write' activity, I have students go back to their seats to get started.

After this activity, I bring everyone back together. To show the new learning of the day, you can have a student come up to the number board and make hops to the number 4. I also like to circle the number that we stopped on.

One last activity that I like to do for the day is a 'Showing Numbers' activity where students cut and sort different pictures that show only the focus number we are working on. After modeling the activity, students go to their seats and work on this independently. If you are short on time, this is great for morning work or centers too!

I discuss with my students how much we have learned about our number of the week! I will ask a few students to tell me how they can show the number 4 or what they know about the number 4. I also will have them turn and talk to a friend about how they can show the number 4 or what they know about the number.
Then it is time to quickly review the skills that we have learned throughout the week. I actually erase EVERYTHING from my number board before the students get to school.

The number board is a quick and easy way to review and such a wonderful visual. Depending on time, you can have different students come up to the number board and choose a part of the number board that they would like to fill in. You can also pick a student and tell them what part of the number board you want them to fill in.
To get the rest of the students involved you can have them help the student, practice whispering the answer to a friend, count out loud, double-check, write the number with their "magic pencil", or write on their leg with their "magic pencil".

After everything is filled in on the number board it is time to do an activity that I actually consider their assessment/understanding of the focus number of the week. I quickly model the "All About the Number 4" activity without doing too much because I want the students to show me their understanding independently.
Students go to their seats and begin working on this activity. I usually pull out my Mr. Sketch Scented Markers because it is such a special day!! Students work extra hard when they see these markers!!

To celebrate all of the hard work and success for our focus number, we end the week by making a Number Hat!!

Next week we will move on to the number 5. I always take the number boards that we have completed and display them in my classroom. They are such great visuals to have displayed in the classroom. I am always seeing my students refer to them for extra support and guidance!
Thank you so much for taking the time to read about how I teach numbers! I hope you were able to get some ideas and were also able to visualize a lot of the activities that I did not have pictures for.
I have a ton of resources that I use when teaching numbers. The activities that you read about above can be found at my TPT Store. You can click on the pictures below to check them out:


I have been asked a lot about how I teach numbers and what my week looks like. I hope this post will give you an idea of what my week looks like and also a lot of new ideas!

Each week of school I have a focus number. I start at the number 1 and go all the way to the number 10. That is 10 weeks of number focus! I am sure you are thinking, what do you do for 10 weeks of numbers?!?! I promise there is soooo much you can do while keeping students engaged and excited the entire time!
What I love about having a number focus each week of school is how much my students really master identifying numbers, counting, writing numbers, identifying number words, making groups, drawing, showing numbers in ten frames, on number lines, tallies, and so much more!
I have also noticed that having a weekly number focus has really set up my students for when it comes time to learn about addition, subtraction, comparing numbers, decomposing numbers, and more. The weekly number focus allows them to mentally know what the numbers look like and how to show the number in different ways that it makes them ready to go when it comes to more difficult skills as the year goes on.
The first week of school, I start with the number 0. You can grab all of the activities for the number 0 for FREE on another one of my blog posts HERE.
The second week of school is when I really get going with the weekly number focus and I start with the number 1.
The rest of this post will give you an example of what my weekly number focus looks like. I break down each day and the activities I do each day. I chose the number 4 as my example to show you.
*NOTE: This is a lot of reading, but I wanted to make it feel like you are there in my classroom!
MONDAY
Today I introduce the focus number of the week. I like to introduce the focus number on my Number Boards.
I start by showing my students the number 4 on the number board and have them say the number with me. I take my finger and model how to make the number 4 by tracing the number with my finger on the number board. I do this a couple of times and then I have the students put their "magic pencil" (which is really just their pointer finger) in the air and practice making the number 4 with me.
Then I model how to make the number 4 on my easel with a dry erase marker. I model this a few times and have students use their "magic pencil" to write the number 4 on their leg or on the floor.

The number word is also on my number board so I like to tell my students that we can also spell the number 4. I spell the number for them and then they spell the number with me as I point to each letter on the number board. I have students practice writing the number 4 with their "magic pencil" one more time.
Now it is time to move around! I allow students to walk around the room to see if they can find the number 4 anywhere in the classroom. They get really excited for this because they want to be the one to find the number! I have numbers all throughout my room and I am sure you do too! I actually didn't realize how many numbers I had around my room until I had students do this activity.
After this, we sit back down and discuss a couple of places that students found the number 4. Then, I model what they will be working on independently at their seats. After modeling a 'Trace, Write, and Find' activity with the number 4 focus I have students go to their seats and they get started.
*Some students work faster than others, so you can have your quick finishers turn over their paper and practice writing the number 4.


After this independent activity, we come back together on the carpet in front of the number board. I ask students to come up and model making the number 4 on the easel. While a student is doing that, everyone else is practicing writing the number 4 with their "magic pencil". Then you can either have a student or yourself write the number 4 on the number board to show the new learning for the day which was identifying and writing the number 4. We practice spelling the number a couple more times too!

One last activity that I like to do for the day is a rainbow writing and filling in the number with an object activity. For the number 4, I like to have students rainbow write the number and then I have them make the number four using square pieces of construction paper. I explain to my students that I like to use squares because it has 4 sides and 4 corners. You can also use rectangles or mention that they would be a great choice to make the number 4 as well because they have 4 sides and 4 corners too! After modeling the activity, students go to their seats and get started.


TUESDAY
I like to start off by reviewing what we learned about our focus number the previous day. I will pull out the number board and ask if anyone remembers what our number of the week is. We will count to the number 4 out loud, use our "magic pencil" to write the number in the sky, and practice spelling the number word.Now I will point out the handprint and tell students that we can show the number 4 with our fingers. I model and then have students try. We touch each finger and count them. Then we close our hand and put one finger up at a time and stop at 4. I tell students to listen for that number 4 and when they hear themselves say the number that will tell them that they need to stop counting. I often hear them count out loud, "1, 2, 3, 4, STOP!!!!" Too funny!!!
Then I will talk about making a group of 4. I have magnets on my whiteboard that I like to use to make a group of. I make a group of 4 a couple different times. I put one magnet at a time on my easel and say 1 number at a time and stop when we get to 4. I show students how the group of 4 can be in a line, in a cluster, a circle, etc. We always double-check the group that I make by touching one magnet and saying one number at a time.
**I really go over the touch and count one at a time because so many times students will count to 3, but only touch one OR they count to 1 and have already touched 3.
I like to turn my easel so my students can't see what I am doing. I will put a bunch of magnets on the easel and make different groups of 4 (with my magnets) and different groups that do not have 4. When I turn the easel back around I have students come up and they point to a group of 4 that they see and circle it with a dry erase marker. The rest of the class helps by counting the group of 4 while the student touches one magnet at a time.

Now it's time to move! I model with a manipulative (bears, counters, buttons, blocks, cereal, etc.) making groups of 4. Then students go to their seats, I pass out the manipulative I chose for the day, and students start making groups of 4 at their tables.


After this activity, we come back together on the carpet in front of the number board. I ask students to come up and model making a group of 4 on the easel with the magnets or draw a group of 4 with a marker. While a student is doing that, everyone else is counting out loud to 4 and reminding the student to stop when they get to 4. I usually allow around 3 to 4 students come up to do this.

Now I will model what they will be working on independently at their seats. After modeling a 'Find a Group of 4' activity, I have students go back to their seats to get started.

To show the new learning of the day, you can have a student come up to the number board and draw 4 pictures to show a group of 4 or you can draw a group of 4. Everyone else will be counting while the group of 4 is being made on the number board and reminding the person when to stop.

WEDNESDAY
I always like to start the day with a review! I briefly review what we learned on Monday by showing the number, drawing the number with our "magic pencil" on our leg, and spelling the number word.Then I do a review of yesterdays learning. I have students show the number 4 on their fingers. Then we count to 4 using our fingers and make sure we stop when we hear ourselves say the number 4. I discuss how we practiced showing 4 by drawing groups of 4 and some that are not. Students come up to the easel and circle all the groups that have 4. When they find a group the rest of the class double-checks by counting out loud while the student touches one picture at a time in the group.
I show students the correct way of touching and counting one picture at a time. I also show the incorrect ways. I will count to 3 quickly while only touching 1 picture and I will count to 1 while touching 3 pictures. This definitely makes my students laugh, but I always feel it is important to show them the correct and wrong way.

I have a space on my number board with a domino. I like to place some dots on one side of the domino and have students determine how many more dots we need to put on the other side to have 4 altogether.

For a fun follow-up activity and to get moving, I like to have students stand up and try to make a group of 4 with their friends. This is a lot of fun for them! If there are students left over that do not make a group of 4 that is okay because it is a great example to show why it is not a group of 4 and to have students try to figure out how many more students they need to make a group of 4. The domino on the number board is great practice before doing this activity.
We all come back together and I talk about how today is all about the ten frame! I always like to ask why it is called a 'ten frame'. I will draw a ten frame on my easel and fill in the boxes with magnets while having students count and tell me when to stop. At this point they remember that they stop when they hear that number 4! I also remind them that it is important to double-check, so we go back and I touch each magnet as they count out loud to make sure that there are only 4 boxes filled in.

I have a GIANT ten frame that I made out of felt and duct tape. I have everyone sit in a big circle around the carpet and I lay the GIANT ten frame in the middle. During this time I have students come up and fill in 4 boxes in the ten frame. This week, we happen to be reading "Pete the Cat and His Four Groovy Buttons"and I had students hold buttons while filling in the 4 spots in the ten frame. We always double-check that we have 4 by counting each student in the ten frame.
I like to put too many students in the ten frame sometimes or too little students and have them determine why that is not correct and brainstorm what we need to do to have 4.


After this activity, I quickly fold up the GIANT ten frame and model what they will be working on independently at their seats. After modeling a 'Ten Frame Fill, Trace, and Write' activity, I have students go back to their seats to get started.

To show the new learning of the day, you can have a student come up to the number board and draw 4 dots in the ten frame to show 4. On my number board, I place velcro on the ten frame and have students come up and velcro stars onto the ten frame. Everyone else will be counting while the ten frame 4 is being filled on the number board.

If time allows, I like to have students work independently on an interactive number book. Each week I have them work on them and each book has a number focus. The best part of all is that they are all FREE!!! You can find them for free at my TPT Store HERE. (This will take you to the Number 4 Book, but the links to the other books are in the description.

THURSDAY
As you know, I always like to start the day with a review! I briefly review what we learned on Monday and Tuesday. This review may involve writing the number with our "magic pencil", count to 4 with our fingers, having someone come to the easel to draw a group of 4, placing a bunch of magnets on my easel and students come up and make a group of 4 with them, etc.I also have a space to on my number board to write tallies and I like to show students how you can show the number 4 with tallies.

Then I do a review of yesterdays learning. I draw a ten frame on my easel. I will have students count with me and let me know when to stop filling in the ten frame. I also like to turn the easel around and fill in 5 or more spaces in the ten frame. Then, I will show students and have them explain to me why the ten frame is wrong when our focus number is the number 4.
I will turn the easel again and put too many dots again or too little dots in the ten frame. I will have students turn and talk to their friend to discuss what is wrong and what needs to be done to have 4 in the ten frame. After talking with their friend, students will tell me what needs to be done and you can have them come up to the easel to show the class.

Now I let my students know that today is all about the number line! I will draw a number line to 10 on my easel. I explain to them that we start at the number 0 on the number line. Every time we say a number we make 1 hop. I really make sure to go over how we only make 1 hop when we say 1 number. Students will count with me as I make the hops on the number line. They also tell me when to stop. I swear that is their favorite part!
The idea of making hops on the number line may seem simple to us, but some students have a hard time with it. Some students make 2 hops for every number they say and sometimes they do not move at all! I often model the incorrect ways to make hops and have students come up and take my hand and help me move to one number at a time.

I have everyone sit on one side of the carpet and I lay the GIANT number line on the other side of them. I place a number under each dot. This is great practice for number order with your students! I always mess up the number order on purpose and have them help me put the numbers in the correct order. They think it is so funny when I mess up!
Once everything is ready, I have a student come up and stand at the number 0 next to the number line. They start hopping to one number at a time and stop when they get to 4. While they are hopping the rest of the class is counting out loud and reminding them when to stop. They LOVE this!! It might sound crazy, but everyone does get a turn. We move fast!!


After this activity, I quickly fold up the GIANT number line and model what they will be working on independently at their seats. After modeling a 'Number Line Hop, Trace, and Write' activity, I have students go back to their seats to get started.

After this activity, I bring everyone back together. To show the new learning of the day, you can have a student come up to the number board and make hops to the number 4. I also like to circle the number that we stopped on.

One last activity that I like to do for the day is a 'Showing Numbers' activity where students cut and sort different pictures that show only the focus number we are working on. After modeling the activity, students go to their seats and work on this independently. If you are short on time, this is great for morning work or centers too!

FRIDAY
Today is the last day of our focus number!! At this point, students have now learned about the focus number of the week in a variety of ways.I discuss with my students how much we have learned about our number of the week! I will ask a few students to tell me how they can show the number 4 or what they know about the number 4. I also will have them turn and talk to a friend about how they can show the number 4 or what they know about the number.
Then it is time to quickly review the skills that we have learned throughout the week. I actually erase EVERYTHING from my number board before the students get to school.

The number board is a quick and easy way to review and such a wonderful visual. Depending on time, you can have different students come up to the number board and choose a part of the number board that they would like to fill in. You can also pick a student and tell them what part of the number board you want them to fill in.
To get the rest of the students involved you can have them help the student, practice whispering the answer to a friend, count out loud, double-check, write the number with their "magic pencil", or write on their leg with their "magic pencil".

After everything is filled in on the number board it is time to do an activity that I actually consider their assessment/understanding of the focus number of the week. I quickly model the "All About the Number 4" activity without doing too much because I want the students to show me their understanding independently.
Students go to their seats and begin working on this activity. I usually pull out my Mr. Sketch Scented Markers because it is such a special day!! Students work extra hard when they see these markers!!

To celebrate all of the hard work and success for our focus number, we end the week by making a Number Hat!!

Next week we will move on to the number 5. I always take the number boards that we have completed and display them in my classroom. They are such great visuals to have displayed in the classroom. I am always seeing my students refer to them for extra support and guidance!
Thank you so much for taking the time to read about how I teach numbers! I hope you were able to get some ideas and were also able to visualize a lot of the activities that I did not have pictures for.
I have a ton of resources that I use when teaching numbers. The activities that you read about above can be found at my TPT Store. You can click on the pictures below to check them out:
(These books are FREE!!)
I also wanted to share my Numbers1-20 SUPER MEGA BUNDLE that includes all of the activities that I mentioned above PLUS number activities for the numbers 11-20!! You can click on the picture below to check it out:
I hope you are all having a wonderful week! :)


Comments
Post a Comment